I first saw a cute bootie like this when I started to get into crocheting more than just a single stitch blanket. However, every pattern I found was either extremely complicated for a baby bootie or too expensive for me to justify paying for it. So I was left to come up with my own pattern. After several months of putting it off, I was finally inspired to get it done this weekend! As this is my very first time making a pattern, I apologize if anything is off. I used several different patterns that I spliced together and it took several attempts at a few different ways of doing things to get it right. I believe I wrote down the final way that worked ;-) Good luck and I hope your booties come of just as cute as mine!
Materials Needed:
- A small amount of yarn. I used I Love This Yarn acrylic, but any worsted weight yarn will do. I chose grey for the sole and alternated purple and black for the rest of the bootie, using up some leftovers from different projects. I have seen a gorgeous example similar to this using an ombre that came out looking like a dragonscale rainbow!
- Size F/3.75mm hook (check gauge after row 3 and adjust hook size as needed)
- Stitch markers are especially helpful when making the sole as the pattern is worked in the round and it is not always easy to keep track of where each row starts, but they are not necessary if you don't have any or are uncomfortable using them.
Stitches used:
- ch - chain (yarn over, pull through loop on hook)
- sc - single crochet (insert hook into stitch, yarn over and pull through stitch, yarn over, pull through both loops on hook)
- hdc - half double crochet (yarn over, insert hook into stitch, yarn over and pull through stitch, yarn over, pull through all three loops on hook)
- dc - double crochet (yarn over, insert hook into stitch, yarn over and pull through stitch, yarn over and pull through two loops on hook, yarn over and pull through the last two)
- ss - slip stitch (insert hook into stitch, yarn over and pull through all)
- sc2tog - single crochet two together (insert hook, yarn over and pull through stitch, insert hook into next stitch, yarn over and pull through stitch, yarn over and pull through all loops on hook)
- hdc2tog - half double crochet two together (yarn over, insert hook into stitch, yarn over and pull through stitch, yarn over and insert hook into next stitch, yarn over and pull through stitch, yarn over and pull through all loops on hook)
- dc2tog - double crochet two together (yarn over and insert hook into stitch, yarn over and pull through stitch, yarn over and pull through two loops, yarn over and insert hook into next stitch, yarn over and pull through stitch, yarn over and pull through two loops, yarn over and pull through all loops on hook)
- Crocodile stitch - this is less of an individual stitch and more of a full technique. I will do my best to explain how this works in my pattern but you can learn how to do it in much greater detail HERE from Moogly. The main difference you will see is that their tutorial goes back and forth where my pattern will work around in a continuous circle.
Pattern as written should fit 9-12 month size foot.
Some babies have a little extra chub on their calves (I love me some baby chub!) and may not fit the 6 scale round. I have included an alteration to the pattern to include 8 scales. You can follow the instructions found within the *asterisks* for this starting in row 12. All pictures from row 12 on will show the 8 scale pattern.
Ch 14 to begin
Row 1: 2 hdc in second ch from hook, hdc in next 11, 6 hdc in last ch from hook. Working up other side of starting chain, hdc 11, 2 hdc in last ch. Do not join - continue working in the round until sole is finished. (32 stitches)
 |
| This is what you should have after row 1 |
Row 2: 2 sc in next 2, sc 8, hdc 3, 2 dc in next 6, hdc 3, sc 8, 2 sc in last 2. (42)
 |
| After the second row is worked. Note how the last stitch is not in the middle of the heel. That is exactly what is supposed to happen. The pattern will work itself out in the next row - PROMISE! |
Row 3: sc 2, 2 hdc in next 3, hdc 8, dc 3, repeat (2dc, dc) 6 times, dc 3, hdc 8, 2 hdc in next 3, sc 2 (54 + 2 to bring you to the middle of the heel)
 |
| Check your guage after this round. It should measure 4.75" front to back now. If not, you may need to use a different hook size. |
Tada! Your sole is now finished! To match my project, you can cut your yarn and add your new color for the rest of the bootie or you can continue on in the same color. That's the beauty of crochet - even if you follow my pattern, your project doesn't have to look like mine!
 |
| If you are making the sole a different color from the rest of the bootie, save yourself some trouble and make two of them now. I find it easier to make sure the soles end up the same size when they are done at the same time. |
Row 4: (color 1) Working in back loops only, sc in each stitch around, ss to first sc. (54)
 |
| After first row starting the sides of the bootie. If switching colors for each row, do so in the slip stitch. Insert hook into first sc of the row, but pull up a loop of your second color. |
 |
| By working in the back loops only for this row, you will see a ribbed edge form around the base of the sole and the sides will begin to go up at a 90 degree angle. |
Row 5: (color 2) ch 1, sc in same stitch, sc in each stitch around, ss to first sc. (54)
 |
| With the second row after the sole added, the sides should no longer want to lay flat. |
Row 6: (color 1) repeat row 5 (54)
 |
| When you get to the last stitch of the row, make sure you are not doing a sc into the slip stitch from the previous row or your stitch count will be off for later rows. |
 |
| After the fourth row up the sides, we are ready to start using decreases to start forming the toe. Check the stitch guide at the top for instructions on how these work. |
 |
| This first row of single crochet together (sometimes also called decreases) starts to form the curved part of the toe. |
 |
| Now that the toe is coming along, the next step is to continue cinching it in and also to start shaping the heel to fit better on the foot by doing a decrease at the start and finish of the next two rows. |
 |
| The toe is just about finished. |
 |
| The boot is now done! Time to get started on the scales. |
Row 12*: (color 1) ch 3, dc in same space, ch 1 skip 1 stitch, dc in next, ch 1 skip 1 stitch, repeat (2 dc in next, ch 1 skip 1 stitch, dc in next, ch 1 skip 1 stitch) 3 times, 2 dc in next, ch 1 (do not skip), dc in next stitch, ch 1 skip 1, repeat (2 dc in next, ch 1 skip 1, dc, ch 1 skip 1) 3 times, ss to top of ch 2. Do not change colors (40)
 |
| This is the base row for the crocodile stitch |
 |
| This is the beginning half of the scale going down the first of the pair of dc from the previous row. |
 |
| Turn the work when you reach the bottom to make it easier to go back up the other side of the scale. |
 |
| This is what your work should look like after the first full row of crocodile scales. |
Row 14: (color 2) Attach yarn in any single dc from previous row. Ch 3 and dc in same stitch, ch 1, dc in space between set of 2 dc (this is the middle of the scale from the row below), ch 1, repeat (2 dc in single dc, ch 1, dc in space between set of 2 dc, ch 1) to end of row, ss to top of ch 3. Do not switch colors (30, *40*)
 |
| By putting a single dc in the double dc and a double dc in the single dc from the previous row, you offset each row of scales. |
 |
| It is a bit easier to see how the scales work in this lighter color yarn. |
Row 16-20: Repeat rows 14-15 twice alternating color 1 and 2 every two rows.
 |
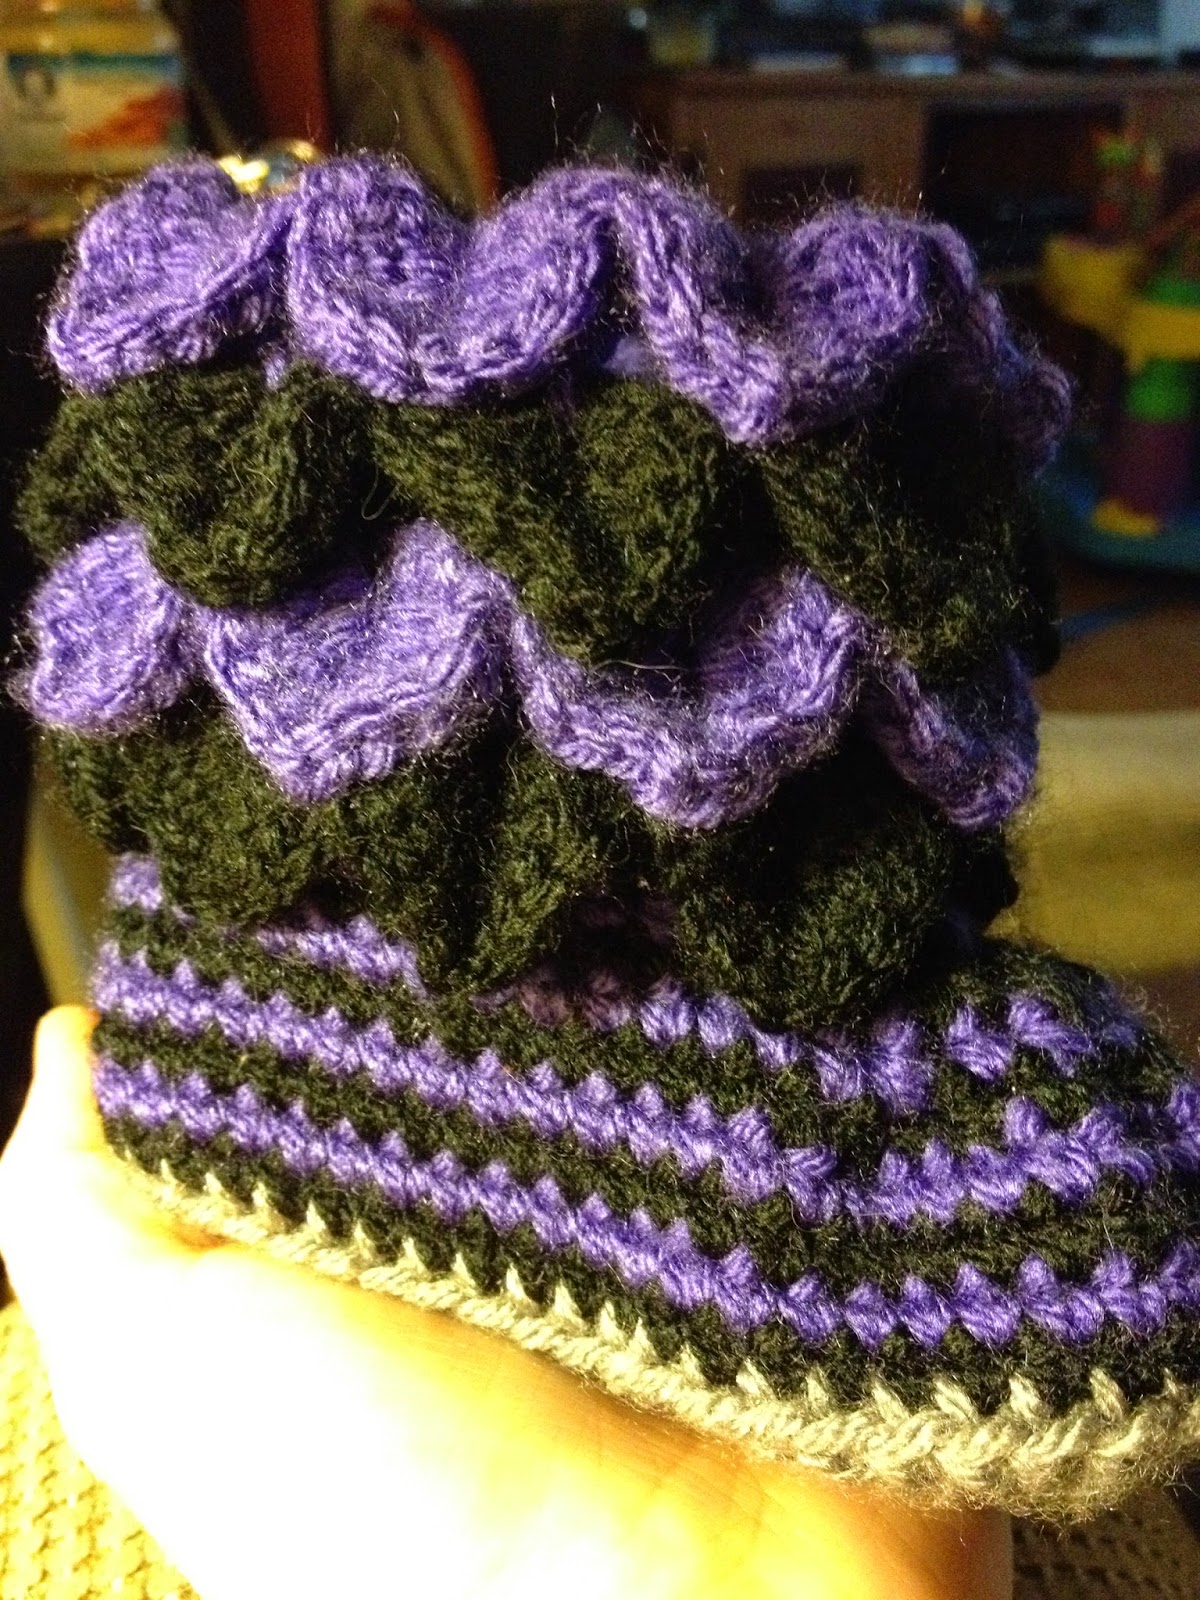
| Once you have 4 rows of scales, your bootie is done! |
 |
| Now make one more just like it and your baby will have the cutest most stylish boots in town! |
I hope you enjoyed this pattern as much as I have. Please feel free to leave a comment below if you have trouble following along, have any requests for future patterns or want to share a picture of your finished projects!
Thanks so much for visiting!
Don't forget to check out my Etsy Shop as well! I'm adding new items regularly, and am willing to make special orders, too! Suggestions welcome!!